So I said I would have some more before/after RAW file edit examples. And I may have gone overboard haha
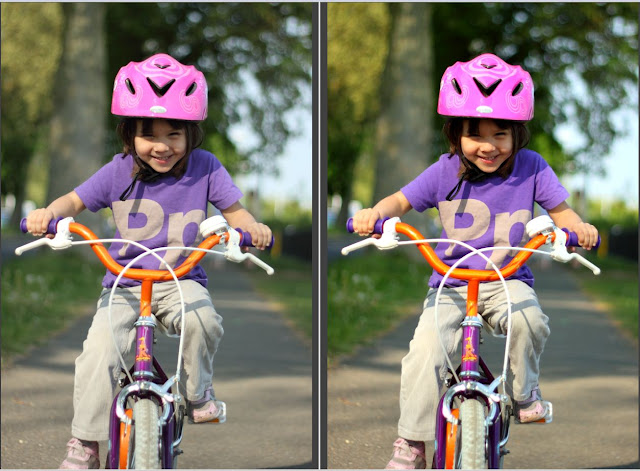
This shot of Geli is probably my favorite example. The after is on the left!(long story) So this is an after/before shot lol It was almost unusable the way I took it. And totally my fault too. I had set the ISO to 1600 the last time I used it because I was shooting indoors and then we went outside and forgot to bring it back down, so it was way over exposed. And yet, I was able to rescue the shot. If you only saw the one on the left, I don't think you would be able to tell, or think that it was an unusable shot initially.
 |
| 1. Rescued shot of Geli! |
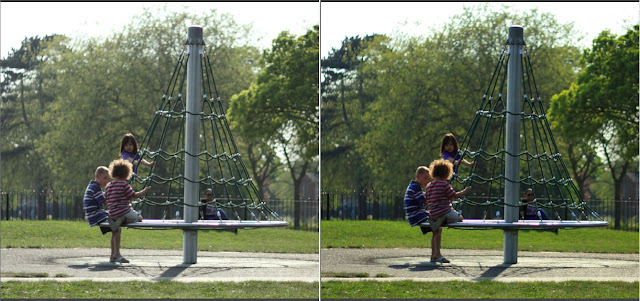
The rest, are just "livened" up pics. Cutting through the haze with some contrast and saturation, and what not. If you think any are overdone, let me know, Because that is what I am trying to stay away from. I numbered them in case you want to point something out.(the rest of the shots, the
before is on the
left, the after on the right).
 |
| 2. |
 |
| 3 |
 |
| 4 |
 |
| 5 |
 |
| 6 |
 |
| 7 |
 |
| 8 |
 |
| 9 |
 |
| 10 |
 |
| 11 |
 |
| 12 |
 |
| 13 |
 |
| 14. Vegan Nachos!! (Yes, there are some tortilla chips under all that!) |


Damn, it's impressive how you saved that pic of Angie, cool. I think you did a good job on all of them
ReplyDeleteDaaam, the first one totally changed!! Wow. And yeah, good job on the rest. :D
ReplyDeleteGood pictures, about the contrast and saturation, I like to photoshop pictures for a forum I visit constantly (and Sergio in awkward situations :P), and one of the things that I need to learn to use correctly is the contrast and saturation, it can be the difference between a good picture and a awesome one, I know that it might not be the same, but still, it's a pain when you don't know how to adjust it.
ReplyDeletei love that before and after view option in that program we use
ReplyDelete